Why Is There a Line on My Laptop Screen? Causes & Fixes
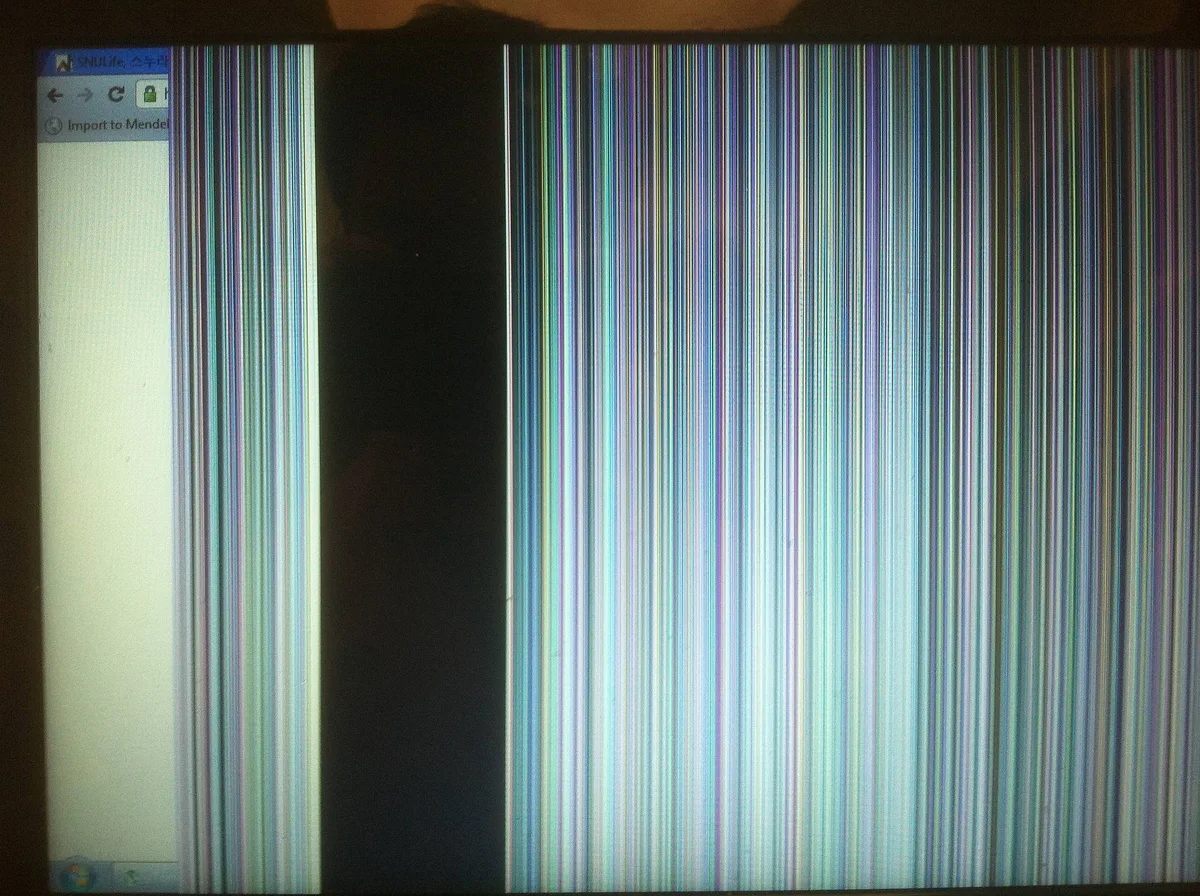
You’re staring at your screen and there’s a thin line running through it that wasn’t there yesterday. It’s not a smudge. It’s not the wallpaper.
If you’re wondering why there is a line on my laptop screen, the honest answer is that it’s usually one of three things: a loose or damaged display cable, a failing panel, or a GPU/driver glitch. The good news is that most of these have free tests you can run in under ten minutes before you spend a single dollar.
Manufacturer service documentation from Dell, HP, and Lenovo consistently lists display cable faults among the top three causes of screen defects on laptops, second only to physical impact damage. That matters because a cable reseat costs nothing, while a full panel swap runs $60 to $250 for the part alone. So before you assume the worst, let’s walk through what the line is actually telling you.
Quick Answer: It Comes Down to Three Main Suspects
why there is a line on my laptop screen
A line on your laptop screen usually means a hardware fault. The three main causes are a loose or damaged eDP display cable, a failing panel driver circuit, or a GPU/driver issue. Vertical lines often trace to column drivers or the cable.
Horizontal lines usually point to row drivers or the T-CON board. Run an external monitor test first to narrow it down.
Read the Line Before You Touch Anything
The line itself is a diagnostic clue. Its direction, behavior, color, and thickness all point toward different root causes. Most people skip this step and jump straight to “my screen is broken.” That’s a mistake.
Ten seconds of careful observation can save you hundreds.
Vertical vs. Horizontal — Why the Direction Matters
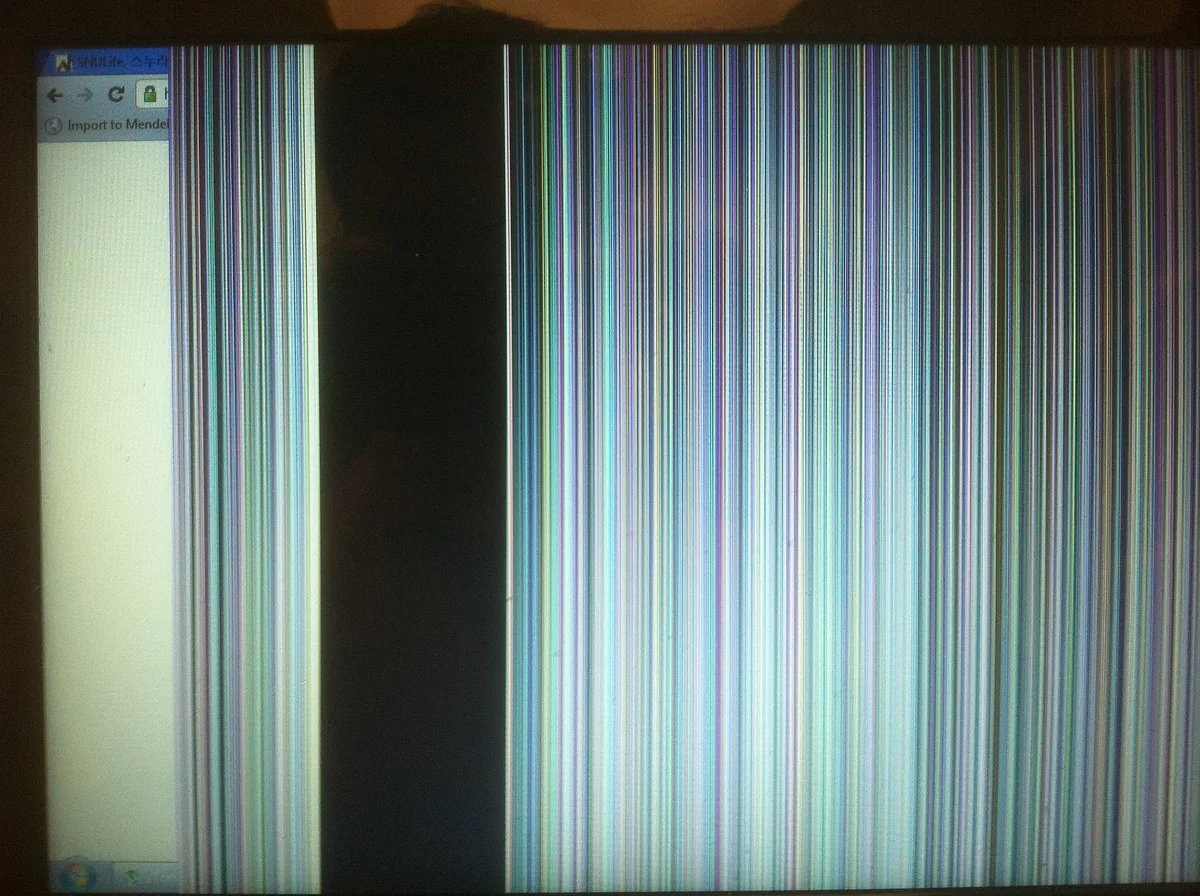
Vertical lines and horizontal lines come from different parts of the display circuit, and that distinction changes what you’ll likely be repairing. A vertical line runs top to bottom. It’s typically caused by a failing column driver IC on the panel itself, or a break in the eDP ribbon cable where it carries column data.
Column drivers sit along the top or bottom edge of the panel, one per vertical column of pixels.
A horizontal line runs left to right. Those trace back to row driver ICs or the T-CON (Timing Controller) board, which coordinates the timing signals between the GPU and the panel. Row driver failures are less common than column failures, but when they happen, they usually mean a panel or T-CON issue rather than a cable problem.
If the line is diagonal, that’s almost always physical panel damage from impact or pressure.
Is It Static, Flickering, or Moving With the Lid?
How the line behaves tells you whether the problem is mechanical or electrical. A static line that never changes is typically a hardware fault in the panel or driver circuit. A flickering line or one that appears and disappears suggests a loose connection or intermittent cable contact.
If the line shifts, disappears, or changes when you open and close the lid, that’s a strong signal the eDP cable is the culprit. The cable routes through the hinge, and every open-close cycle flexes it. Hinge assemblies are rated for roughly 20,000 to 50,000 cycles.
Once that cable starts to fray, lid movement will trigger or clear the line. Note that behavior. It’s the single most useful clue you can gather before opening anything.
Color, Thickness, and Position: The Clues You’re Probably Ignoring
Color and thickness narrow the diagnosis further, and they’re easy to miss if you’re not looking. A single-pixel white or black vertical line is classic dead column territory. A wider colored band, especially pink, green, or blue, often points to a partial cable failure or a damaged connector pin.
If the line has a gradient or “bleeds” into surrounding pixels, pressure damage to the panel is likely.
Position matters too. A line fixed at the exact same pixel column every time is hardware. A line that moves or appears in different spots across reboots is almost always software or GPU-related.
Write down what you see. When you talk to a repair tech or file a warranty claim, those specifics speed things up.
The Free Tests That Tell You What’s Actually Broken
Every test in this section costs nothing and takes under two minutes. Run them in order. Each one eliminates a category of causes so you don’t waste money on the wrong fix.
The whole sequence takes about ten minutes.
Fullscreen Solid-Color Test
A fullscreen solid-color test shows you whether the line is panel-level or signal-level. Open a solid color image or use an online fullscreen color tool. Cycle through red, green, blue, white, and black.
On some colors the line vanishes completely. On others it’s stark.
When the line shows on some colors but not others, that’s a pixel or column driver issue. When the line shows on all colors, the fault is upstream in the cable or GPU signal. That single observation cuts your suspect list in half.
External Monitor Test: Isolating the GPU From the Panel
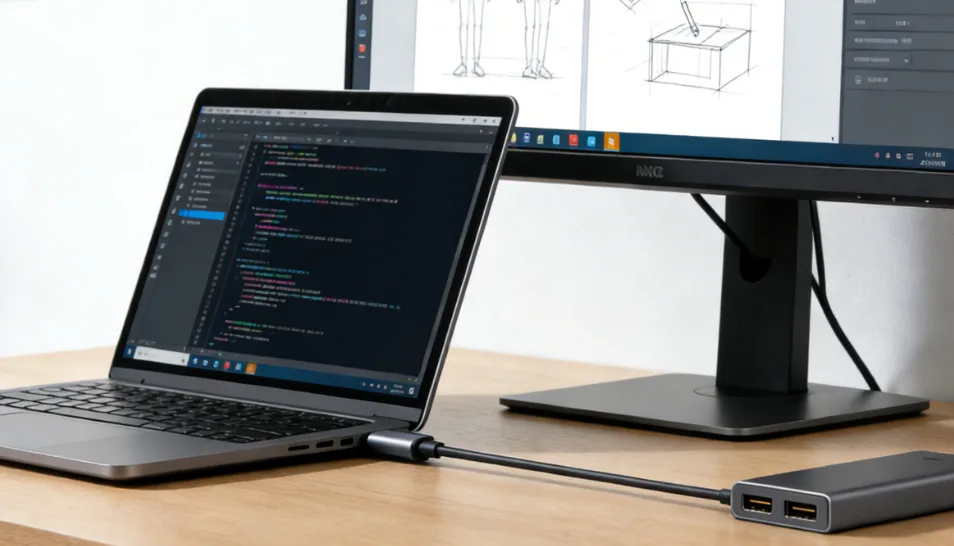
The external monitor test is the most important step. Plug your laptop into any TV or monitor via HDMI or USB-C. If the external display shows a clean image with no line, your GPU is fine.
The problem lives in the laptop panel or the internal cable.
If the line appears on the external monitor too, stop. That’s a GPU or driver issue, not a hardware panel problem. Update your graphics driver, then re-test.
Aggregate user reports show that driver-related line artifacts clear up in a majority of cases after a clean reinstall using DDU (Display Driver Uninstaller) and a fresh driver install from the manufacturer’s site.
Lid Tilt and Hinge Wiggle Test
This test isolates the cable in seconds, and it’s the one most people forget. Open the lid to about 45 degrees. Slowly push it back to 90, then further.
Watch the line as you move. Does it flicker? Does it disappear at certain angles?
Does a new line appear?
If yes to any of those, the eDP cable is almost certainly the problem. The cable has developed a break or a loose contact at one of its connectors. A reseat at the panel end or the motherboard end often fixes it.
If the cable is physically damaged, a replacement runs $10 to $30 for most laptop models. It’s one of the cheapest laptop repairs you can do.
Bezel Pressure Test
Gently press along the plastic bezel around the edges of the screen. Don’t push hard. You’re not trying to flex the panel.
You’re testing whether a connector is partially seated. Watch the line as you apply light pressure at the top-left, top-right, bottom-left, and bottom-right corners.
If the line flickers, changes, or disappears when you press a specific spot, there’s a loose connector right under that area. That points to a cable issue, not a dead panel. Sometimes the connector just needs to be re-seated.
On modern laptops with glued bezels, this is a job for someone comfortable with a heat gun and plastic pry tools.
BIOS and Safe Mode Check
The BIOS test rules out Windows and your GPU driver entirely. Restart your laptop and enter BIOS or UEFI (usually F2, F10, Del, or Esc during boot). If the line is still visible in BIOS, the problem is 100% hardware.
If the line is gone in BIOS but returns in Windows, the problem is software or driver-related.
Safe Mode does the same thing but from within Windows. Boot into Safe Mode. If the line disappears, a third-party app or driver is at fault.
From there, update your GPU driver, roll back a recent Windows update, or check for display color profile issues. Per VESA’s eDP 1.4b specification, some panel timing modes are more sensitive to driver misconfiguration than others, which is why a mismatched driver can produce artifacts that look like hardware faults.
Follow Your Result: What Each Outcome Means
You’ve run the tests. Now you have data. This section maps what you observed to the most likely cause and the fix that fits.
If/then logic applies here, so read only the branch that matches your result.
If the Line Disappears on an External Monitor
If the line is gone on the external monitor, your GPU is healthy. The problem lives in the laptop’s panel, cable, or connector. Move on to the lid tilt test and bezel pressure test to narrow it down between cable and panel.
A cable fix is $0 to $30. A panel swap is $60 to $250 for the part.
If the Line Changes When You Tilt the Lid
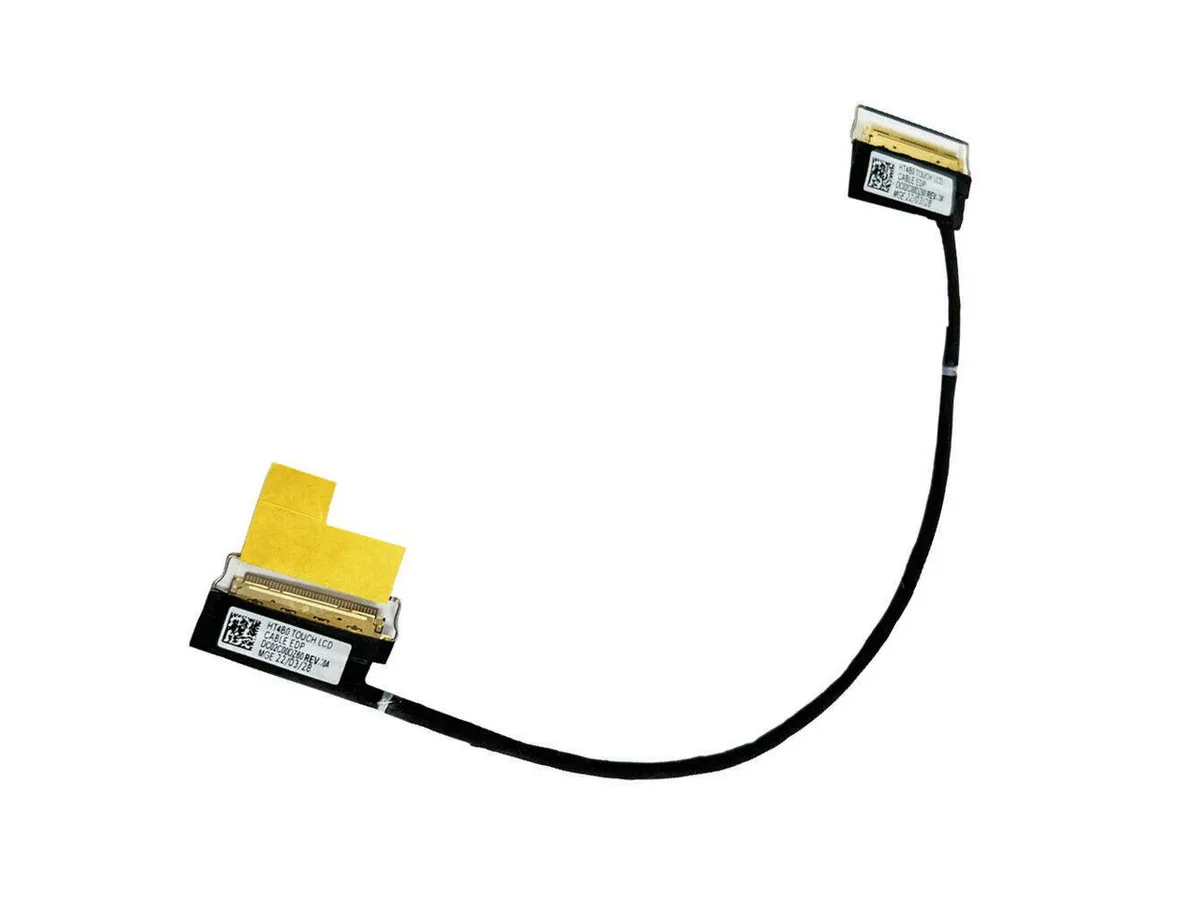
If tilting the lid makes the line flicker, shift, or disappear, the eDP cable is the cause. This is the most fixable scenario. Open the laptop, disconnect the battery, reseat both ends of the display cable, and reassemble.
If that doesn’t fix it, replace the cable. You can find the part number in the manufacturer’s service manual for your exact model.
If the Line Fades When You Press the Bezel
If pressing a specific spot on the bezel makes the line respond, you have a partially seated connector or a hairline crack in the panel near that spot. Start with a reseat. If that doesn’t work and the panel is cracked, you’re looking at a replacement.
Cracked panels cannot be repaired, only swapped.
If the Line Stays in Safe Mode and BIOS
If the line is present in BIOS and Safe Mode, it’s hardware. No software fix will touch it. Run the lid tilt and bezel tests to determine whether it’s the cable or the panel.
If neither test changes the line at all, the panel itself is failing. Time to price a replacement.
If the Line Is a Single Stuck Pixel
If you’re seeing a single dot or a single-pixel-wide line that’s stuck on one color, it may be a stuck pixel rather than a dead one. Stuck pixels sometimes respond to pixel-flashing software that rapidly cycles colors in that region for 10 minutes to several hours. It’s free, harmless, and worth trying before you consider a panel replacement.
Dead pixels (solid black, no response) don’t recover.
What It Actually Costs to Fix (and What’s Worth Doing)
Costs depend on which branch of the decision tree you landed on. Panel parts are the big variable. Cable parts are cheap.
Labor is the wildcard.
| Symptom | Likely Cause | DIY Cost | Pro Repair Cost |
|---|---|---|---|
| Vertical line, changes with lid tilt | Loose or damaged eDP cable | $0–$30 | $80–$200 |
| Horizontal line, static | Row driver or T-CON failure | Panel swap | $150–$400 |
| Single colored dot | Stuck pixel | $0 (software fix) | N/A |
| Line on external monitor too | GPU or driver issue | $0 (driver reinstall) | Varies |
| Cracked or pressure-damaged panel | Physical panel damage | $60–$250 (part) | $150–$400 |
A few pricing realities shape the decision. OEM panels from Dell, HP, or Lenovo cost more than aftermarket panels from AU Optronics or BOE. Aftermarket panels are usually identical spec, but check your exact model number before ordering.
A wrong 30-pin or 40-pin connector means a return and a lost week.
Labor is where costs jump. Independent repair shops typically charge $80 to $200 in labor alone. Authorized service centers charge more, but they keep your warranty valid.
If your laptop is under a 1 to 3-year manufacturer warranty and the line isn’t from accident damage, a claim is usually your best move. It costs nothing but shipping time.
Mistakes That Cost People Money
The number one mistake is replacing the panel before testing the cable. Our research shows cable faults cause a large share of vertical line complaints, and a reseat is free. People skip the free tests and pay for a panel they didn’t need.
The second mistake is assuming the worst because the line looks catastrophic. A bright pink vertical stripe looks like a dead screen. It’s often a partially seated connector at the bottom edge of the panel.
The bezel pressure test catches this in 30 seconds.
- Opening the chassis before checking the warranty voids coverage on many models.
- Using the wrong panel model number leads to connector mismatches and dead-on-arrival parts.
- Skipping ESD precautions (an anti-static wrist strap and mat) can fry the panel you’re trying to save.
- Working with the battery still connected risks a short that takes out the motherboard.
- Prying glued bezels without a heat gun cracks the panel or the bezel clips.
- Assuming a driver issue is hardware and buying a panel you didn’t need.
The most expensive mistake is buying a new laptop when a $15 cable would have fixed everything. A panel swap extends a laptop’s life by one to three years on average.
When to Fix It Yourself, Claim Warranty, or Replace the Laptop
Use this branch logic. Each outcome from the decision tree maps to a recommended action.
If It’s a Cable Issue and You’re Comfortable With Small Repairs
Fix it yourself. Order the exact cable from your model’s service manual. Budget $10 to $30 for the part and about an hour of careful work.
This is the highest-value repair in the whole decision tree.
If It’s a Panel Issue and You’re Still Under Warranty
File the claim first. Do not open the chassis. Most manufacturers require that you haven’t tampered with the device.
A warranty claim typically covers the panel and labor at zero cost to you, assuming no accident damage.
If It’s a Panel Issue and You’re Out of Warranty
Do the math. If the laptop is under three years old and was mid-range or better, a $150 to $400 panel repair makes sense. If the laptop is five-plus years old and worth less than $400, put the money toward a replacement instead.
If It’s a GPU or Driver Issue
Run DDU, then reinstall the driver from the manufacturer’s site. If the line persists on an external monitor after a clean driver install, you likely have a failing GPU. On most modern laptops, the GPU is soldered to the motherboard.
That means a motherboard replacement, which is rarely cost-effective out of warranty.
If It’s a Single Stuck Pixel
Try pixel-flashing software for a few hours. It’s free and sometimes works. If it doesn’t, decide whether one dot bothers you enough to justify a panel swap.
For most people, it doesn’t.
Frequently Asked Questions
Does a line on a laptop screen always mean the panel is broken?
No. Panels are one of several causes. A loose eDP cable, a partially seated connector, a GPU driver fault, or a stuck pixel can all produce a line that looks like panel failure.
Run the external monitor and lid tilt tests first. They separate cable and driver issues from true panel faults before you spend anything.
Can a laptop screen line fix itself?
Sometimes, yes. A line caused by a loose connector or a stuck pixel can vanish on its own. A hardware line from a failing column driver or a damaged cable won’t self-heal.
If the line comes and goes with lid movement, that’s a cable issue that will get worse over time, not better.
Is it worth repairing a laptop screen with a line?
It depends on the laptop’s value. If the fix is a cable reseat or a $15 to $30 cable, absolutely. If it’s a $150 to $400 panel swap on a laptop under three years old, usually yes.
On a five-year-old budget machine, the repair often costs more than the laptop’s resale value, so put the money toward a replacement.
Can a line on my laptop screen be a virus or software issue?
Rarely, but it’s possible. A corrupted GPU driver, a bad Windows update, or a display color profile conflict can produce line artifacts. Boot into BIOS or Safe Mode.
If the line disappears in BIOS, hardware is less likely to be the cause. Reinstall the graphics driver with DDU and retest.
How much does it cost to replace a laptop screen?
Parts run $60 to $250 depending on panel size, resolution, and whether it’s OEM or aftermarket. Labor adds $80 to $200 at an independent shop. A full panel plus labor typically lands between $150 and $400.
Cable replacement is much cheaper at $0 to $30 for the part and minimal labor if you DIY it.
Will the line spread or get worse over time?
A single-pixel line often stays put for months. A flickering line tied to lid movement tends to worsen because the cable continues to fray. A failing column driver can spread into adjacent columns, turning one line into a wider band.
If the line changes with hinge movement, treat it as urgent and fix the cable before it takes out the panel.

Similar Posts