How to Disable a Laptop Keyboard (3 Easy Methods)

You want the fastest way to turn off a built-in laptop keyboard without breaking anything else. The honest answer is that “how to disable notebook keyboard” has three different solutions depending on whether you want a quick toggle, a permanent change, or a physical disconnect. Most people reach for Device Manager first and then discover it quietly re-enables itself after the next reboot.
That surprise isn’t a glitch. Internal keyboards on most notebooks connect through the legacy PS/2 controller interface exposed by the Windows i8042prt driver, which handles keyboards differently from plug-and-play USB devices. In our research across Windows, macOS, and Linux documentation, that single architectural detail explains why so many “disable keyboard” tutorials fail.
Here’s how to pick the right route for your setup.
how to disable notebook keyboard
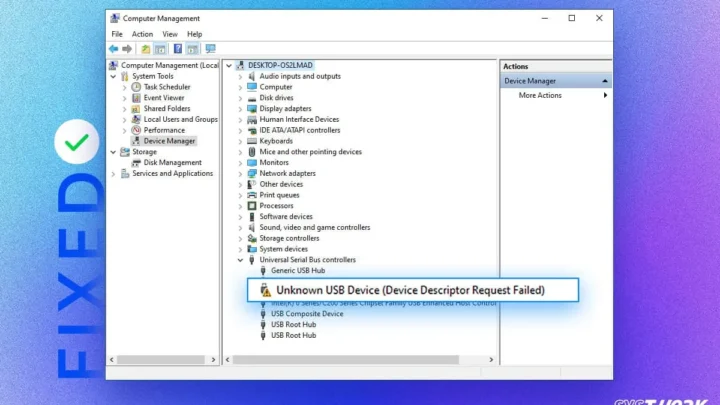
On Windows, open Device Manager, expand Keyboards, right-click the built-in device, and select Disable device. This only lasts until you reboot. For a permanent fix, edit the i8042prt service in the Registry.
On Linux, run xinput --disable with the correct device ID. On macOS, use a remapping tool instead, since no native toggle exists.
Why the “Just Disable It” Advice Usually Fails
The problem starts with how your laptop’s internal keyboard talks to the operating system. USB keyboards are hot-pluggable and easy to remove in software. Internal keyboards usually aren’t, because they route through the PS/2 controller or a low-level I2C bus the OS treats as essential hardware.
Windows exposes that controller through a kernel driver called i8042prt. Disabling a device entry in Device Manager often triggers a restart rather than an actual shutdown of the keyboard. Many users report the keys working again within seconds, or after the next restart.
There’s also a safety valve Microsoft builds in on purpose. If Windows detects that your only keyboard has been removed or disabled, it will sometimes re-enable the internal one to prevent lockout. That behavior is by design, not a bug, and it’s the single biggest reason casual disable attempts don’t stick.
So before you pick a method, decide which of these three tiers you actually need:
- Temporary: useful for cleaning the keyboard or a quick typing session on an external board. Resets on reboot.
- Reboot-persistent: survives restarts but is reversible through the same Registry or policy change.
- Hardware: the internal keyboard is physically disconnected inside the chassis. Only reversal is reconnecting it.
Each tier has a different risk profile and a different set of prerequisites. Getting the tier right up front saves you from doing the same procedure three times.

First, Decide Which Kind of Disable You Actually Need
Pick your scenario from the list below. The right method almost always follows from why you want the keyboard off, not from which tutorial you found first.
Cleaning, typing on an external board, fault isolation, or kiosk lockdown
If you’re wiping crumbs off the keys, a temporary Device Manager disable is enough. Reboot restores everything with zero risk.
If you’re typing on an external mechanical keyboard and want the laptop’s deck out of the way, you want reboot-persistent. Otherwise Windows will keep re-enabling the built-in board every time you restart.
If you’re isolating a suspected hardware fault, say a stuck key that fires on its own, software disable is diagnostic only. It tells you whether the keyboard is the culprit. The real fix is hardware.
If you’re building a kiosk or headless machine, you need Group Policy or registry-level persistence so the setting can’t be undone by a USB replug.
The one thing to lock down before you touch anything: an external keyboard that works
Do not start any disable procedure without a second working input method. This is the single most common cause of self-inflicted lockouts we see in forum threads and support tickets.
- Plug in a USB keyboard and confirm every key responds.
- If USB isn’t an option, set up Remote Desktop or SSH access from another device.
- Save your work. Some methods require a restart to take effect.
- Have a way to reach Safe Mode or the recovery environment, just in case.
If you skip this step and the disable works perfectly, you now own a laptop with no way to type. That’s a five-minute fix if you have an external keyboard on hand. If you don’t, it’s a disassembly job.
Windows: Three Routes, Three Levels of Permanence
Windows gives you three real options, and they differ mostly in how long the change lasts. Pick the one that matches the tier you decided on above.
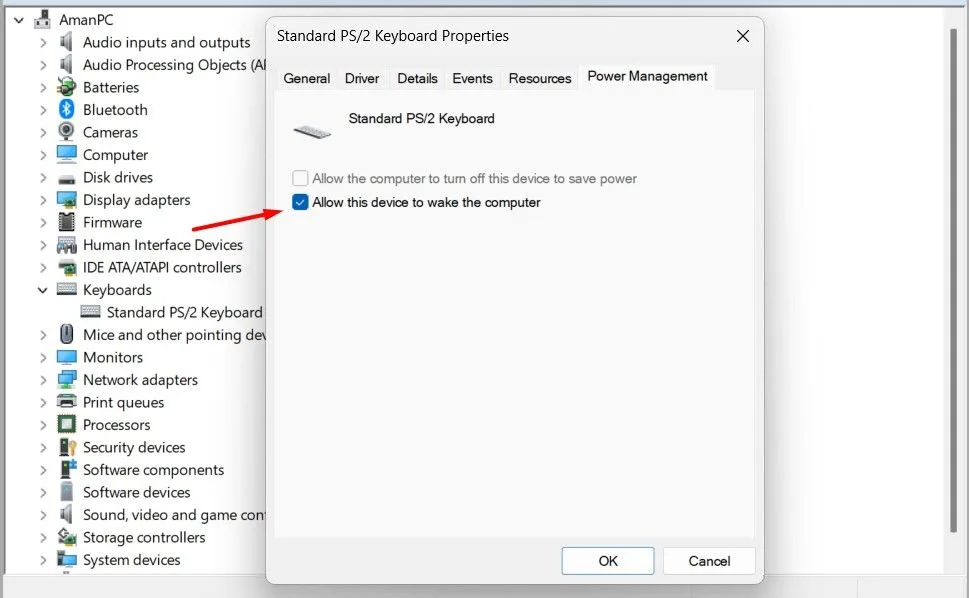
Device Manager, the 30-second toggle that resets on reboot
This is the fastest method and the one most tutorials show. It’s great for temporary work and useless for anything persistent.
- Press
Win + Xand choose Device Manager. - Expand the Keyboards category.
- Right-click the entry labeled HID Keyboard Device or PS/2 Keyboard.
- Choose Disable device and confirm.
If two keyboard entries exist, disconnect any external keyboard first. Then the remaining entry is your internal one. After the disable takes effect, the built-in keys should stop responding immediately.
The catch: restart the machine and the keyboard comes back. Microsoft’s own documentation on Device Manager notes that disable is a driver-state change, not a hardware removal, and the OS reinitializes it on boot.
Registry edit on i8042prt, the reboot-persistent method
This is the real permanent fix on Windows. It changes the startup behavior of the PS/2 keyboard driver itself, so the change survives restarts.
Before you touch the Registry, back it up. File > Export > save a .reg file to a USB drive.
- Press
Win + R, typeregedit, press Enter. - Navigate to
HKEY_LOCAL_MACHINE\SYSTEM\CurrentControlSet\Services\i8042prt. - Double-click the Start value.
- Change the value from 1 to 4. Value 1 means enabled at boot, value 4 means disabled.
- Click OK and restart the machine.
On many systems, the built-in keyboard will be dead from boot. To reverse it, plug in your external keyboard, reopen the Registry, set Start back to 1, and reboot.
If you want to go further, some guides suggest also adjusting the UpperFilters value. Only do this if the simple Start change doesn’t stick. Renaming UpperFilters incorrectly can break the touchpad too.
Group Policy and Device Installation Restrictions, the enterprise-grade lockdown
This is the method IT departments use for kiosks and shared laptops. It prevents the keyboard from being reinstalled at all, which solves the re-enable-after-reboot problem at the policy level.
- Open
gpedit.msc(Windows Pro and Enterprise only). - Navigate to Computer Configuration > Administrative Templates > System > Device Installation > Device Installation Restrictions.
- Enable Prevent installation of devices not described by other policy settings.
- Alternatively, use Prevent installation of devices that match any of these device IDs and add the keyboard’s hardware ID.
Windows Home doesn’t include Group Policy Editor. If you’re on Home, the Registry route is your practical ceiling without third-party tools.
| Method | Persistence | Difficulty | Risk |
|---|---|---|---|
| Device Manager | Until reboot | Easy | Very low |
Registry (i8042prt) | Permanent until reverted | Medium | Medium |
| Group Policy | Permanent until reverted | Medium | Low |
| Hardware disconnect | Physical only | Hard | High |
macOS and Linux: What Actually Works on Each
Neither macOS nor Linux offers the same one-shot toggle Windows does, but both have workable paths. The trick is understanding what each OS will and won’t let you disable from user space.

macOS, no native toggle, so remapping is the real answer
macOS does not provide a built-in “disable internal keyboard” option in System Settings. Apple Support documentation for Accessibility and Keyboard settings only exposes remapping, key repeat, and modifier adjustments, not device-level disabling.
In practice, Mac users rely on third-party utilities. Karabiner-Elements is the most commonly cited option. It hooks into the low-level input stack and can disable a specific device by its vendor and product ID.
A simpler workaround: create a custom keyboard layout that maps every key to “no action.” This works for cleaning and for typing on an external board, though it doesn’t reduce power draw or completely silence the hardware.
Linux, xinput –disable under X11 versus the Wayland problem
On Linux, the answer splits cleanly by display server. Under X11, disabling the internal keyboard is a one-line command. Under Wayland, that command won’t work at all.
For X11:
- Open a terminal.
- Run
xinput listto see your devices. - Find the ID number next to the AT Translated Set 2 keyboard or similar internal device.
- Run
xinput --disable <id>, replacing<id>with the number.
The keyboard stops responding instantly. To re-enable, run xinput --enable <id>.
Under Wayland, xinput doesn’t see or control input devices the same way. There’s no universal replacement. Options include compositor-specific settings (GNOME and KDE expose limited controls) or tools like evtest and libinput for diagnostics.
Disabling the internal keyboard permanently on Wayland often requires a custom udev rule or a kernel module blacklist, which is a real project rather than a quick fix.
Making Linux changes survive a reboot
xinput is runtime-only. A logout or reboot undoes it. To persist the change, you have two reliable options:
- Add the
xinput --disable <id>command to a startup script in your desktop environment’s autostart directory. - Write a udev rule that matches the device by its ID and sets the appropriate attribute at boot.
The udev route is more robust, but it requires getting the device’s vendor and product IDs exactly right. Test the command manually first, confirm it works, then automate it.
The Hardware Route: Disconnecting the Keyboard Ribbon Cable
Software disable is the safe path. Hardware disconnect is what you reach for when software won’t cooperate, when the keyboard has a physical fault, or when you need the setting to be truly permanent.
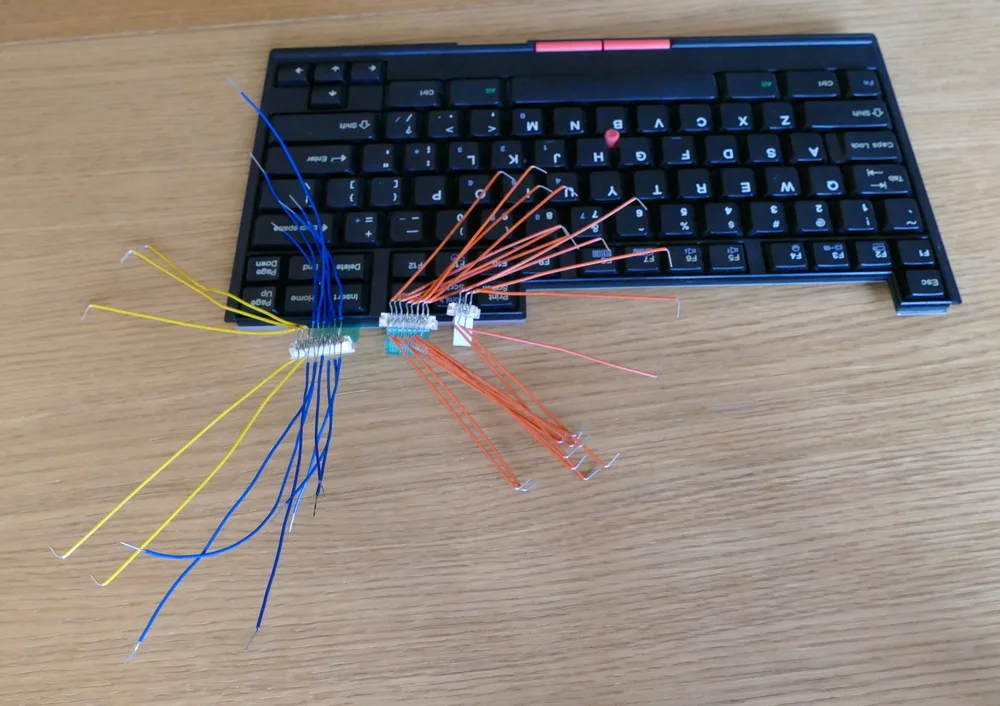
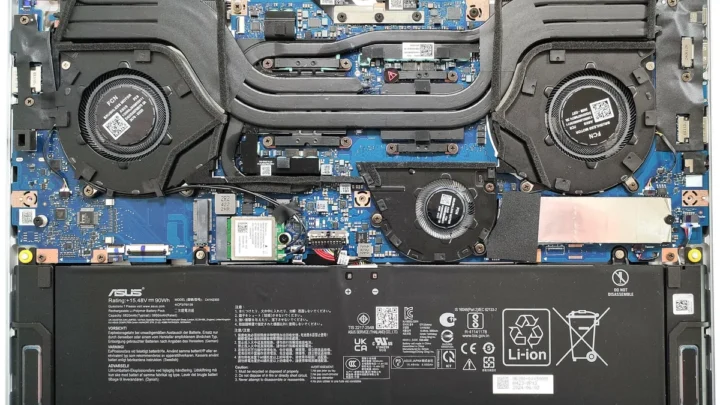
On most consumer notebooks, the internal keyboard connects to the motherboard through a flat ribbon cable with a zero insertion force connector. Disconnecting it removes the keyboard from the system entirely. No driver, no OS update, and no USB replug will bring it back.
This is a chassis-open procedure. Manufacturer service manuals from Lenovo, Dell, and HP document the exact disassembly order per model. The general flow looks like this:
- Power off, unplug the charger, and remove the battery if it’s user-removable.
- Ground yourself. Static discharge can kill a motherboard in one touch.
- Follow the service manual to remove the bottom cover or the top deck.
- Locate the keyboard ribbon cable, usually a wide flat connector near the top of the board.
- Lift the retention latch, then slide the cable straight out. Do not pull at an angle.
- Reassemble. Test with an external keyboard before closing everything up.
Two things trip people up. First, some thin laptops and nearly all recent MacBooks have soldered or riveted keyboards with no removable ribbon. On those machines, the hardware route doesn’t exist.
Second, most manufacturers treat chassis opening as warranty-voiding. Check your coverage before you pick up a screwdriver.
If the goal was fault isolation and the fault disappears after disconnect, you’ve confirmed the keyboard was the problem. Replacement keyboards for common models run roughly $20 to $70 for the part, plus labor if you don’t do it yourself.
Mistakes That Lock People Out, and How to Avoid Them
The most common failure isn’t a broken procedure. It’s a broken recovery plan. Here’s what we see go wrong most often, and how to sidestep each one.
Disabling the wrong HID device and killing your touchpad
The Keyboards category in Device Manager often lists two entries with nearly identical names. One is your internal keyboard. The other can be a composite device that also handles the touchpad on some models.
If you’re not sure which is which, unplug every external keyboard first. Then hover over each entry and check the Hardware IDs. The internal keyboard will usually show ACPI\PNP0303 or a similar PS/2 identifier, while HID peripherals show a HID\VID_ prefix.
Disable the ACPI one, leave the HID entries alone.
Windows updates silently re-enabling your keyboard
Cumulative updates occasionally reinstall or refresh the i8042prt driver, which resets your Registry Start value back to 1. If the keyboard wakes up after a Windows update, that’s why.
The fix is Group Policy or Device Installation Restrictions, not another Registry edit. Policy-level blocks survive driver reinstallation in a way that a single value change does not.
Rebooting with no working input device
This happens when someone disables the keyboard, restarts to “make it stick,” and discovers the external keyboard got unplugged during the reboot. You’re now staring at a login screen with no way to type.
The recovery path on Windows is Safe Mode, which loads a minimal driver set and often restores input. On macOS, you may need to boot into Recovery. On Linux, a live USB works.
If none of those are available, you’re opening the chassis.
Forgetting that USB replugs can override the disable
On some Windows builds, unplugging and replugging an external keyboard triggers a device re-enumeration that also refreshes the internal keyboard. If your disable keeps reversing itself, this is the cause. Lock the setting at the policy level if you need it to hold.
Choosing Your Method: A Quick Decision Guide
Match your goal to the method. If you’re cleaning the keyboard, use Device Manager. If you’re typing on an external board permanently, use the Registry edit.
If you’re locking down a kiosk, use Group Policy. If software has failed and you need a guaranteed disconnect, go hardware.
| Situation | Best Method | Time Required |
|---|---|---|
| Cleaning, quick tasks | Device Manager | 1 minute |
| External keyboard full-time | Registry edit | 5 minutes |
| Kiosk or shared laptop | Group Policy | 10 minutes |
| Fault isolation | Device Manager | 2 minutes |
| Persistent software failure | Hardware disconnect | 20 to 60 minutes |
| Mac without native toggle | Karabiner-Elements | 10 minutes |
| Linux, X11 session | xinput –disable | 1 minute |
| Linux, Wayland session | udev rule or compositor setting | 15 to 30 minutes |
Rollback plans for each method
Have the undo ready before you start. For Device Manager, re-enable the device from the same menu. For the Registry, restore the Start value to 1 and reboot.
For Group Policy, disable the policy and run gpupdate /force. For xinput, run xinput --enable <id>. For hardware, reconnect the ribbon cable.
Write down whatever you changed. If you’re the sort of person who edits the Registry once every two years, future-you will not remember what you did. A sticky note inside the battery bay works surprisingly well.
Frequently Asked Questions
Will disabling the built-in keyboard void my warranty?
Not by itself. Software methods like Device Manager, Registry edits, and Group Policy leave zero physical evidence and won’t affect warranty coverage. Opening the chassis to disconnect the ribbon cable usually does void the warranty, so check your manufacturer’s terms first if the machine is still under coverage.
Does the Device Manager method ever stick after a reboot?
Rarely, and only by accident. Windows is designed to reinitialize PS/2-class keyboards on boot, so Device Manager disable is temporary by design. If you need persistence, use the Registry i8042prt Start value change or Group Policy instead.
Can I disable only some keys instead of the whole keyboard?
Yes. On Windows, tools like AutoHotkey can remap or nullify individual keys, which is perfect for disabling a stuck Windows key or a broken spacebar. On macOS, Karabiner-Elements handles the same job.
On Linux, xmodmap or setxkbmap can rebind single keys without touching the whole device.
What happens if I disable the keyboard and my external one dies?
Why does my keyboard keep re-enabling itself after every update?
Windows cumulative updates often refrefresh the i8042prt driver, restoring it to the default enabled state. Group Policy or Device Installation Restrictions solve this cleanly. Registry edits alone can be undone by any update that touches that driver.
Is disabling the internal keyboard safe long-term?
Yes. The keyboard draws negligible power, so there’s no meaningful battery gain. Leaving it disabled won’t damage the hardware, the motherboard, or the OS.
Just make sure you’ve documented how to reverse it, because the day you need the built-in board again will come at the worst possible time.

Similar Posts