How to Find Laptop Specs: Quick & Easy Guide
If you’re staring at a laptop and wondering what’s actually inside it, you’re not alone. Most people never learn how to find laptop specs until they need to upgrade RAM, run a game, or sell the machine. The sticker on the bottom is often wrong or missing.
Retail listings can be vague or misleading.
Here’s the good news: every major operating system ships with tools that read your hardware directly. Windows, macOS, and ChromeOS all expose CPU, RAM, storage, and GPU details without any downloads. According to Microsoft’s own support documentation, the Settings app alone covers most of what you’ll ever need.
how to find laptop specs
On Windows, open Settings > System > About to see CPU, RAM, and OS build. On macOS, click the Apple menu and choose About This Mac. On a Chromebook, open Settings > About ChromeOS > Diagnostics.
For deeper detail, use msinfo32 or dxdiag on Windows, or System Information on Mac. Every method is free and takes under a minute.
Start Here: Which Situation Are You In?
Before you touch any tool, figure out which bucket you fall into. The right approach changes based on whether the laptop boots, what OS it runs, and what you actually need the specs for. If you skip this step, you’ll waste time in the wrong menu.
Ask yourself three questions:
- Does the laptop turn on and reach the desktop?
- Which operating system is it running?
- Are you checking specs to upgrade, to sell, or to troubleshoot?
If the laptop boots normally, use the built-in OS tools. That’s the fastest path and covers 90% of cases. If it won’t boot at all, you’ll need BIOS, a serial number lookup, or a physical inspection instead.
If you’re buying used, verify everything with a second tool because sellers sometimes exaggerate.
The purpose matters too. Checking specs to see if you can add RAM means you need the exact SODIMM type and slot count. Checking specs to sell means you want a clean summary for your listing.
Checking specs to troubleshoot means you need driver and BIOS versions. Same laptop, different sections of the same menus.
The Two Fast Paths: Built-In Tools for Windows, macOS, and ChromeOS
Every OS gives you a one-click summary. That summary is enough for most people. Here’s how to reach it on each platform, and what you’ll actually see.
Windows: Settings, msinfo32, and dxdiag
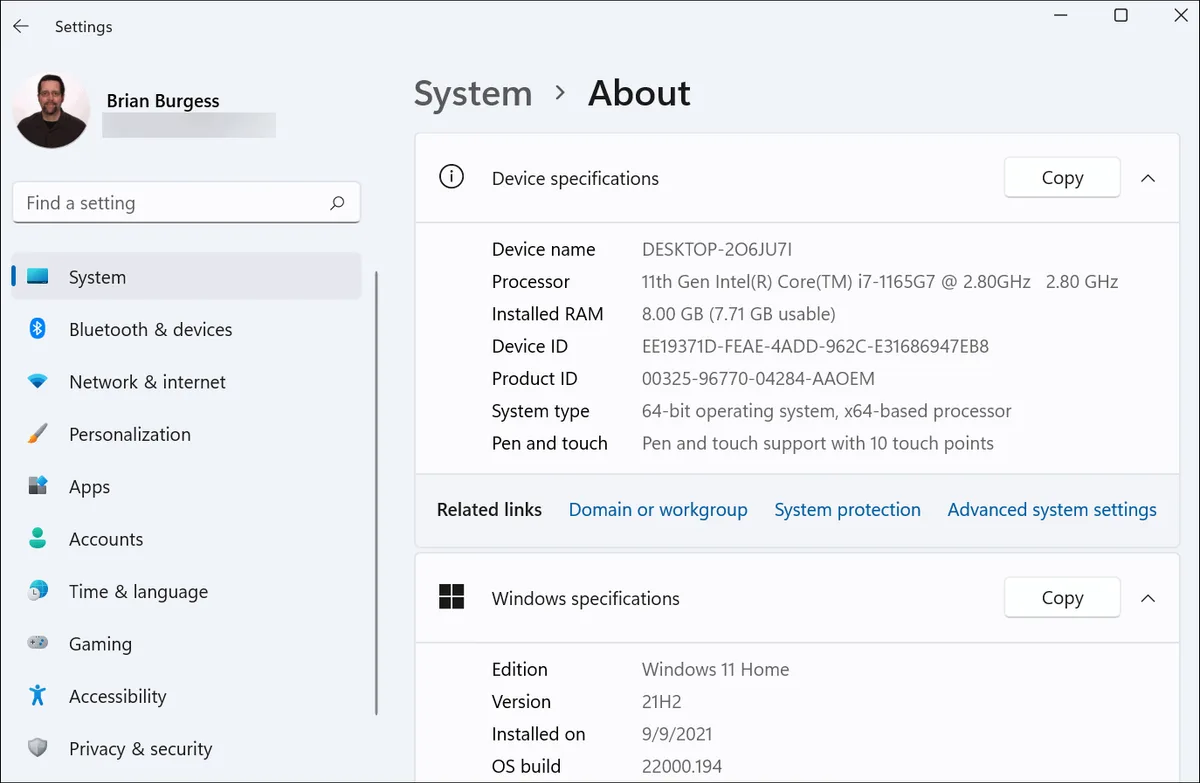
Windows 11 and Windows 10 expose specs in three places. Each one shows a different slice of the machine.
- Settings > System > About: CPU name and speed, installed RAM, system type (32-bit or 64-bit), Windows edition and build, device name, and product ID.
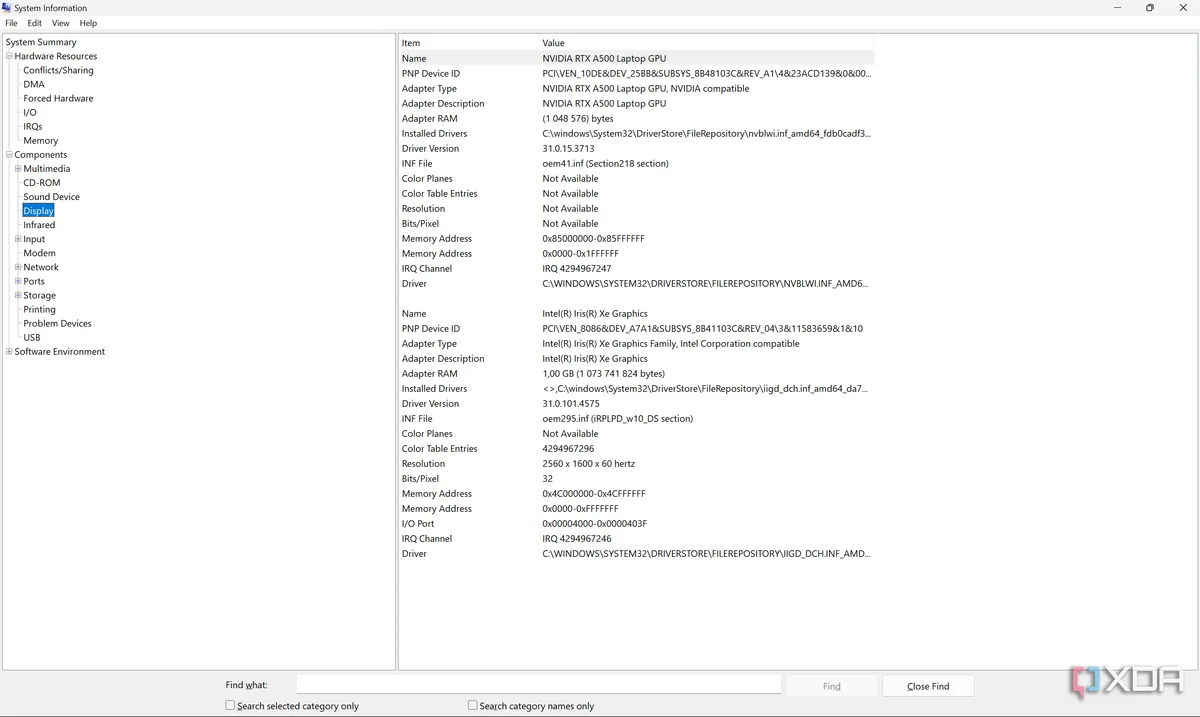
- System Information (msinfo32): everything Settings shows, plus BIOS version, motherboard model, baseboard manufacturer, and dozens of hardware IDs.
- DirectX Diagnostic Tool (dxdiag): your GPU, VRAM, display modes, and audio devices. This is the tool to use when a game won’t launch.
To open msinfo32, press Windows + R, type msinfo32, and hit Enter. For dxdiag, do the same but type dxdiag. Both run instantly and need no downloads.
One quirk to know: Windows reports “usable RAM” that’s slightly lower than installed RAM. If you bought 16GB and see 15.7GB, that’s normal. Some memory is reserved for the integrated GPU and system firmware.
macOS: About This Mac vs. System Information
About This Mac is the quick look. Click the Apple menu in the top-left corner and select it. You’ll see the chip name (M-series or Intel), memory, serial number, and macOS version.
That’s enough for casual checks.
For the full picture, click More Info or System Report. You’ll get storage breakdown, battery cycle count, display resolution, Wi-Fi adapter model, and every port’s status. On Apple Silicon Macs, this report also shows the unified memory architecture and Neural Engine details.
The battery section is worth bookmarking if you’re buying used. Cycle count under 300 is healthy. Anything above 800 usually means a replacement is coming soon.
Chromebook: Settings and Diagnostics
ChromeOS keeps it simple. Open Settings, scroll to About ChromeOS, then click Diagnostics. You’ll see CPU, memory, storage, battery health, and network info.
For deeper detail, open the Chrome browser and type chrome://system in the address bar. You’ll see raw hardware data including the board name, firmware version, and every sensor reading. It’s not pretty, but it’s complete.
What Each Spec Actually Means (and Which Ones Matter for You)
The spec sheet is only useful if you know which numbers drive your workload. A photographer and a programmer need different things from the same laptop.
CPU, RAM, Storage, GPU, Decoded
- CPU (processor): The brain. More cores help with multitasking and video editing. Higher clock speed helps with single-threaded tasks like web browsing. Intel Core and AMD Ryzen model numbers encode generation and tier. An i5-1235U is 12th-gen, mainstream, low-power. An i7-13700H is 13th-gen, high-performance, higher wattage.
- RAM: Short-term memory. 8GB is the practical floor for Windows 11 in 2026. 16GB is the sweet spot for most users. 32GB and up is for video editing, virtual machines, and heavy development work.
- Storage: Your files and OS live here. SSDs are dramatically faster than HDDs. NVMe drives beat SATA SSDs. A 512GB SSD shows up as roughly 475GB usable because of formatting overhead.
- GPU: Handles graphics. Integrated GPUs (Intel Iris, AMD Radeon in APUs, Apple’s unified graphics) are fine for office work and light gaming. Dedicated GPUs (NVIDIA GeForce RTX, AMD Radeon RX) are required for serious gaming, 3D rendering, and machine learning.
If you only care about email and browsing, CPU and RAM are your focus. If you game or edit video, GPU and storage speed matter most. If you run virtual machines, RAM and CPU cores are the bottleneck.
When the Laptop Won’t Boot or the OS Won’t Cooperate
A dead laptop isn’t a dead end. You can still pull the specs from firmware, the manufacturer’s database, or the hardware itself. Each method has tradeoffs.
BIOS/UEFI Lookup
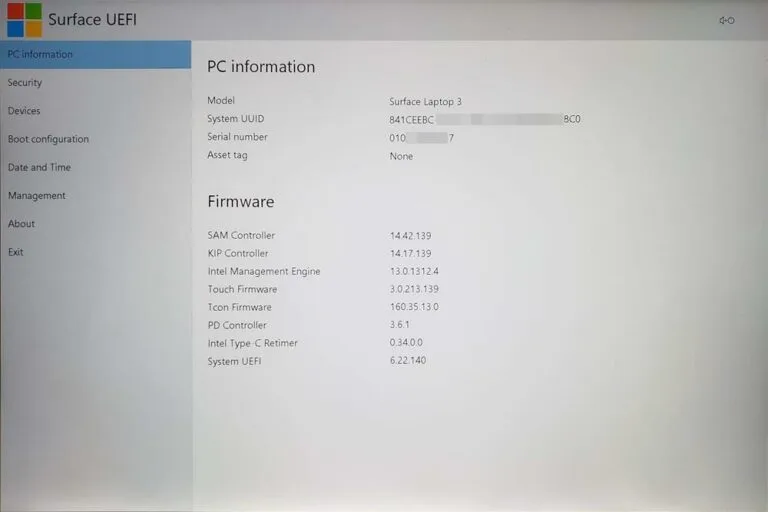
The BIOS or UEFI is firmware that runs before the operating system. It reads your hardware directly, so it works even when Windows is corrupted or the drive is dead.
Restart the laptop and tap the setup key during boot. Common keys are F2, F10, Del, or Esc. The exact key appears briefly on screen.
Inside the BIOS, look for a System Information, Main, or Hardware Monitor tab. You’ll typically see CPU model, installed RAM, drive model, and BIOS version.
BIOS menus differ wildly between brands. Dell, HP, Lenovo, and ASUS each use their own layout. If you can’t find the info you need, take a photo of every screen and search the model number later.
Serial Number and Service Tag Lookup on the Manufacturer Site
Every laptop has a unique serial number or service tag printed on a sticker underneath. Dell calls it a Service Tag. HP calls it a Serial Number.
Lenovo calls it a Machine Type and Serial.
Type that code into the manufacturer’s support site, and you’ll get the exact factory configuration. This is the most reliable method when buying used. It shows what the laptop shipped with, not what a seller claims it has.
If the sticker is missing or worn, boot into the BIOS. The serial number is usually listed there too.
Physical Inspection as a Last Resort
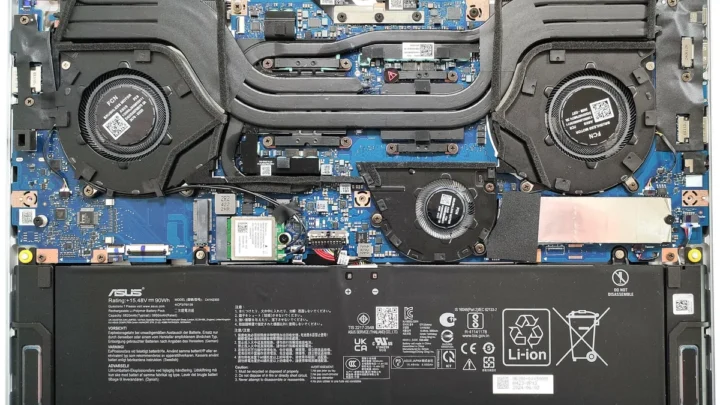
When nothing else works, open the back panel. You’ll see the RAM sticks, storage drive, and battery directly. RAM modules have labels showing capacity, speed, and DDR generation.
SSDs have model numbers you can search online.
Only do this if the warranty has expired. Opening the case on a covered laptop can void the coverage. Use ESD precautions and keep track of every screw, because they’re often different lengths.
Buying or Selling Used? Verify Like a Pro
Used laptop listings range from honest to flat-out deceptive. A seller might swap a 16GB stick for 8GB before shipping. They might list “Intel Core i7” without mentioning it’s a 2015 chip.
Verification takes five minutes and saves hundreds.
Red Flags in Listings and Stickers
Watch for these patterns when shopping used:
- Vague CPU listings: “Intel Core i7” without a model number usually means an old generation.
- No serial number in photos: legitimate sellers include it so you can verify the config.
- Stickers that disagree with the OS: the sticker might say 16GB while Windows shows 8GB.
- “Upgraded” or “custom” without details: could mean mismatched RAM or a cheap replacement SSD.
- Prices far below market: usually a sign of stolen hardware or a bait listing.
Third-Party Tools Worth Trusting (CPU-Z, HWiNFO, and Friends)
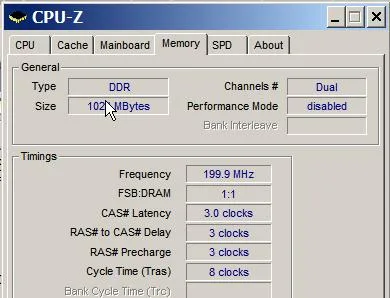
Built-in tools are great, but they sometimes hide details. Third-party utilities fill the gaps. Stick to well-known, widely reviewed names.
- CPU-Z: Shows exact CPU model, stepping, RAM timings, and motherboard chipset. Free, portable version available.
- HWiNFO: The most detailed option. Reports every sensor, fan speed, and voltage rail. Overkill for most people, essential for diagnosing thermal issues.
- GPU-Z: Dedicated GPU details including VRAM type, clock speeds, and driver version.
- CrystalDiskInfo: Storage health, power-on hours, and SMART data. Critical for checking a used SSD.
Download these only from the official developer sites. Fake “spec detector” downloads are a common malware vector.
Windows Activation, Battery Health, and Warranty Checks
Before you hand over money, run three quick checks:
- Windows activation: Open Settings > System > Activation. It should say “Windows is activated with a digital license.” If it says otherwise, the license may be tied to another machine.
- Battery health: On Windows, run
powercfg /batteryreportin Command Prompt. The report shows design capacity vs. current capacity. Anything below 80% means degradation. - Warranty status: Enter the serial number on the manufacturer’s site. Most list the warranty expiration date publicly.
These three checks catch the most common used-laptop scams. They take about two minutes total.
Common Mistakes That Cost People Money
The wrong spec check can lead to a bad purchase or an upgrade that doesn’t fit. Here are the errors our research turns up most often.
Trusting the Sticker Over the OS
The sticker on the bottom reflects the factory config, not the current one. If someone upgraded or downgraded parts, only the OS tells the truth. Always cross-check with Settings or System Information.
Skipping the GPU Check Before Buying a Game
A laptop can have a fast CPU and still choke on modern games. Integrated graphics look fine in the spec listing until you realize there’s no dedicated GPU. Run dxdiag and confirm the exact GPU model before you commit.
Confusing Soldered RAM With Upgradeable RAM
Thin laptops often solder RAM to the motherboard. Ultrabooks, many MacBooks, and most sub-14-inch machines fall into this group. If you’re buying to upgrade later, check the RAM configuration first, because soldered memory can’t be swapped.
Ignoring Storage Math
A 256GB SSD shows roughly 238GB usable. A 512GB drive shows about 475GB. That’s normal formatting and partition overhead, not a scam.
But if the gap is bigger than expected, it’s worth investigating.
Assuming All USB-C Ports Are Equal
Some USB-C ports carry data only. Others handle Thunderbolt, DisplayPort, or charging. The port shape tells you nothing.
Check the spec sheet or the System Information report for exact capabilities.
Forgetting to Check the BIOS Version
An outdated BIOS can cause fan noise, battery drain, and driver conflicts. Manufacturer sites list the latest BIOS version by model number. Compare that to what msinfo32 reports.
Quick Reference: Which Tool for Which Situation
Here’s a decision table for the moments you just want a fast answer. Skim the left column, pick your situation, and follow the right column.
| Your Situation | Best Method | Time Needed |
|---|---|---|
| Laptop boots, need specs fast | Settings > About (Windows) or About This Mac | 30 seconds |
| Need BIOS version or motherboard model | msinfo32 (Windows) or System Information (Mac) | 1 minute |
| Game won’t launch, need GPU info | dxdiag | 1 minute |
| Laptop won’t boot at all | BIOS/UEFI, serial lookup, physical inspection | 5-15 minutes |
| Buying used, need to verify config | Serial number on manufacturer site + CPU-Z | 5 minutes |
| Checking battery health on Windows | powercfg /batteryreport in Command Prompt | 2 minutes |
| Checking battery on Mac | System Information > Power | 30 seconds |
| Fleet audit for IT | PowerShell with Get-ComputerInfo | Depends on scale |
The pattern is simple. If the OS runs, start there. If it doesn’t, drop to firmware.
If even firmware won’t cooperate, go physical or use the serial number.
One practical tip: screenshot the results once you find them. Specs rarely change after setup, so having a saved screenshot is faster than reopening menus later. On Windows, press Windows + Shift + S to snip the screen.
On Mac, use Shift + Command + 4.
Frequently Asked Questions
How do I find my laptop specs without turning it on?
Enter the BIOS or UEFI by tapping F2, F10, Del, or Esc during boot. The System Information tab lists CPU, RAM, and drive model. If the sticker is intact, type the serial number into the manufacturer’s support site for the exact factory config.
Where do I find the CPU model on Windows 11?
Open Settings > System > About. The “Processor” line shows the full model number, including generation and tier. For deeper detail like stepping and cache size, run CPU-Z from the developer’s official site.
How can I tell if my RAM is upgradeable?
Check the System Information report for RAM slot count and type. If the report shows “soldered” or only one channel with no slot info, the RAM is likely fixed. Manufacturer service manuals, available on their support sites, confirm this for every model.
Does dxdiag show all my specs?
No, dxdiag focuses on graphics, audio, and display. It shows GPU model, VRAM, driver version, and monitor modes. Use msinfo32 or Settings > About for CPU, RAM, and OS details.
How do I check laptop specs before buying used online?
Ask the seller for the serial number or service tag in the listing photos. Enter it on the manufacturer’s site to see the factory configuration. Then have them run CPU-Z and screenshot the memory and CPU tabs to prove the current setup matches.
What’s the difference between systeminfo and msinfo32?
They show the same data in different formats. systeminfo in Command Prompt gives a text summary you can copy. msinfo32 opens a graphical interface with more categories and search. Both are built into Windows and need no installation.
Why does Windows show less RAM than I installed?
Windows reserves some memory for the integrated GPU, system firmware, and hardware addressing. This is normal behaviour. If the gap is several gigabytes, though, check Task Manager’s Performance tab for hardware reserved memory.

Similar Posts